You’ve had your acrylic nails on for a while, and now you’re ready to say goodbye to them. Removing acrylic nails isn’t always the most pleasant experience, but you can try a few tricks to make the removal as painless as possible. The good news is with some patience and the right technique; you can remove your acrylic nails without irritation or damage to your natural nails. In this article, we’ll walk through some of the best ways to remove acrylic nails without discomfort. The key is to take it slow, be gentle with your nails, and have the proper tools. Follow these tips, and your natural nails will be acrylic-free before you know it.
Remove Acrylic Nails Soak Off Your Acrylic Nails
The best way to remove acrylic nails without pain is to soak them off. Here’s how to do it:
You’ll need acetone (nail polish remover), cotton balls, foil, cuticle oil, and a nail file. First, file down the surface of your acrylics to rough them up a bit. This helps the acetone penetrate better.
Next, soak the cotton balls in pure acetone and place them on your nails. Wrap each finger in foil to trap the acetone against your nails. Let your fingers soak for 15-20 minutes. The acetone breaks down the acrylic, softening it so you can gently scrape it off.
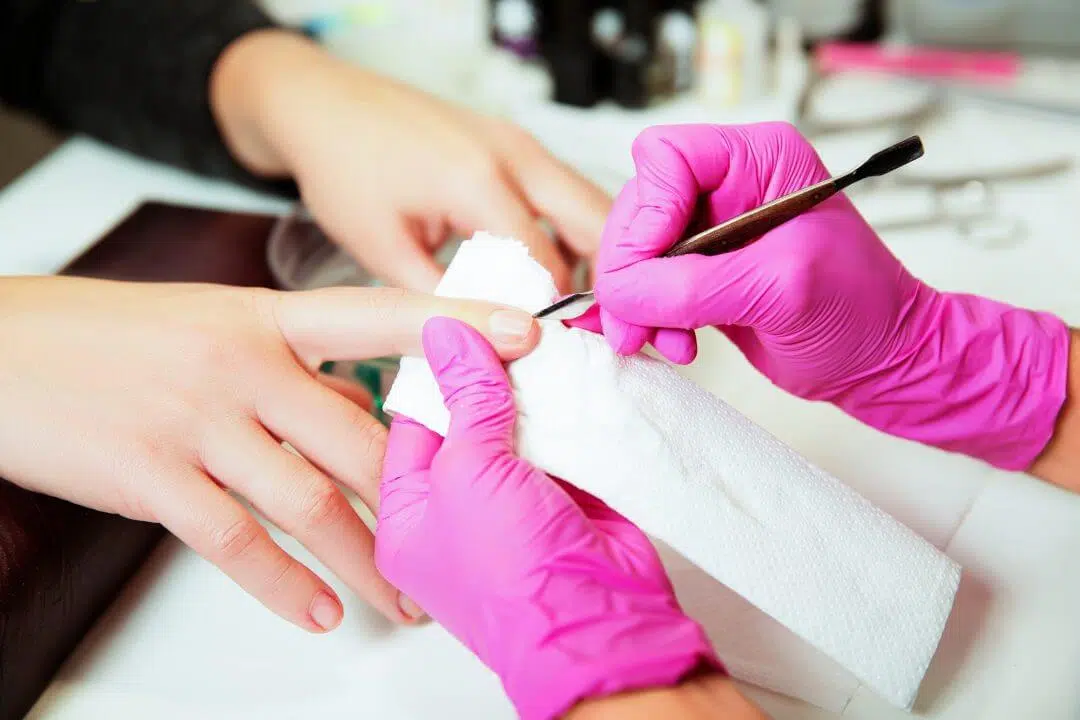
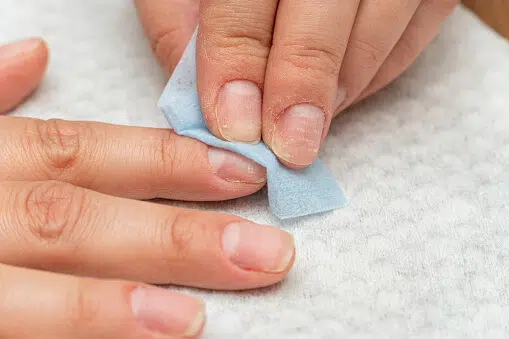
After soaking, use an orangewood stick to push off the acrylic from your nails gently. Have patience – take breaks if needed and re-soak to avoid irritation. Apply cuticle oil to moisturize your nails and skin.
If there’s stubborn acrylic left, you may need to repeat the soaking process. But avoid scraping too hard, which can damage your natural nails. With regular acetone soaks and gentle prying, your acrylics will come off without pain or damage. Your natural nails may feel dry at first, so continue moisturizing them daily.
In a week or so, your nails will recover their natural strength, and you’ll be ready for a fresh set of acrylics or gels – or give your natural nails a well-deserved break! Removing acrylics at home is inexpensive and painless if you take time and soak them properly. Your nails and wallet will thank you.
Use Acetone and Foil Wraps
The tried-and-true method for painlessly removing acrylics at home is acetone and foil wraps.
First, gather some supplies: acetone nail polish remover (100% acetone works best), cotton balls, tin foil, cuticle oil, and nail clippers. You’ll also want a nail file to lightly buff the surface of your acrylics. This creates little grooves for the acetone to seep into, helping it break down the acrylic faster.
Next, cut strips of tin foil that are large enough to wrap around your fingers. Soak the cotton balls in acetone and place them on your acrylic nails. Wrap each finger snugly in foil, sealing the edges to trap the acetone close to your nails.
Let your fingers soak for 10-15 minutes. The foil and acetone soften the acrylic without drying your nails and skin. Remove the foil wraps and gently use the nail clippers to pry off as much of the acrylic as possible.
Soak another round if needed. Once most of the acrylic is off, use the nail file to remove any remaining bits. Rinse your hands with water and massage in cuticle oil to rehydrate your nails and skin.
With some patience and the right technique, you can remove your acrylics at home without damaging your natural nails. The foil wrap method is very effective and helps avoid the pain of prying or picking off acrylics. Your nails will thank you for the TLC!
File Them Down Gently
Filing down your acrylic nails is one of the gentler methods for removing them without pain. This gradual process will thin out and weaken the acrylic, making them easier to pop off once filed down.
Use a coarse nail file.
Start with a coarse nail file, around 80 to 100 grit. Gently file in one direction, using small strokes. Focus on filling the top edge and surface of the acrylic, not the natural nail underneath.
As you file, the acrylic will become thinner and more flexible. This can take 10 to 15 minutes of filing per nail to complete. Be patient and take breaks to avoid over-filing. Your natural nails should start to peek through as the acrylic thins out.
Use a finer grit as needed.
Once the acrylic is paper-thin, switch to a finer grit file, around 150 to 180 grit. This will smooth the surface and open up the sides of the acrylic to loosen it from your natural nails. The acrylic should start lifting at the edges – use the file to lift these edges away from the pin gently.
Soak for quick removal (optional)
If desired, you can speed up the removal process by soaking your nails in pure acetone to dissolve some acrylics. The filing will have already weakened the acrylic, allowing the acetone to penetrate. After washing, gently scrape and pry off the loosened acrylic with an orangewood stick.
Avoid damage to your natural nails.
Be careful not to file or pry the acrylic off in a way that damages your natural nails. Keep some nail oil or moisturizer on hand to hydrate your nails after removing the acrylic. Your nails may feel dry and weak initially, but with proper care and time, your natural nails will restore themselves.
Filing off your acrylics gradually is a safe way to remove them at home without pain or damage. Your acrylics can be removed comfortably in about 30 to 60 minutes with patience and the proper technique. Your natural nails will thank you for the TLC!
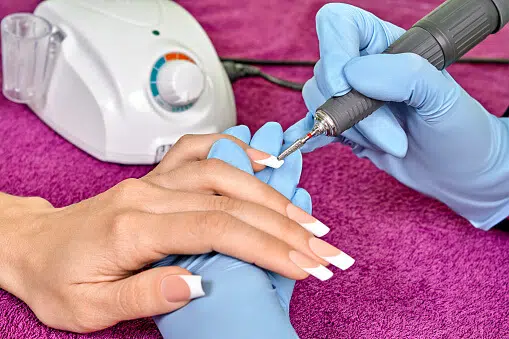
Get Professional Help From a Nail Technician
Getting professional help from a nail technician is often the gentlest and most effective way to remove acrylic nails. They have the proper tools, training, and experience to remove acrylics without damaging your natural nails.
Find a reputable nail salon or technician.
Do some research online or ask friends for recommendations to find a nail salon with skilled technicians experienced in acrylic removal. Check reviews to ensure they take proper care and have a good reputation. Once you find a good salon, please schedule a consultation to meet your technician, view their tools and setup, and get a feel for their level of care and expertise.
The removal process
The technician will first file down the surface of the acrylic to rough up the area so the removal solution can penetrate better. They apply a nail polish remover or acetone solution to soften the acrylic and loosen the bond from your nails. As the acrylic softens, they gently pry and scrape it away using nail tools. They then buff and file your nails to remove and shape any remaining debris.
Additional nail care
After removal, your natural nails may feel weak or sensitive. The technician can apply a nail strengthener or hardener and moisturize your nails and the skin around them. They may also suggest a follow-up nail treatment like a paraffin wax to hydrate and soothe your nails. Limit the use of your nails for a day or two to prevent breakage while they recover their strength.
Seeing a professional nail technician for acrylic removal is the best approach. They have the proper training, tools, and techniques to remove acrylics without causing damage or pain. While it may cost more than a DIY removal, keeping your nails healthy and avoiding injury is worth it. Professionals can also provide additional nail care to rehydrate and strengthen your nails after the acrylics are gone. Your nails will thank you for the professional TLC!
Avoid Damaging Your Natural Nails
When removing your acrylic nails, avoiding damaging your natural nails underneath is important. Your nails are delicate, and acrylic removal can weaken or injure them if not done properly. Follow these tips to keep your natural nails healthy:
Soak the Acrylics First
Soaking your nails in acetone breaks down the acrylic, loosening the bond from your natural nails. Gently file the surface of the acrylic to rough it up, then soak cotton balls in pure acetone and place them on your nails. Wrap your fingers in foil or plastic bags and let soak for 15-20 minutes. The acrylic should soften enough to scrape off easily with an orangewood stick.
Be Gentle When Scraping
Never use sharp tools to scrape off the acrylic. An orangewood or rubber-tipped stick is best. Gently push off the acrylic with the bar in small sections. Don’t forcefully rip or tear the acrylic off, as this can damage your nail underneath. Take your time and be patient—rushing can lead to injury.
Moisturize and Nourish
Once the acrylic is removed, your nails may feel dry and weak. Apply a thick nail cream or cuticle oil and gently massage it into your nails and the skin around them. The moisturizer will hydrate your nails, and the massage will increase circulation, promoting nail growth. Continue moisturizing daily until your nails feel strong again.
Avoid Harsh Chemicals
In the days following acrylic removal, avoid using harsh chemicals on your nails, like lacquers, polishes, and removers. Give your nails time to recover their strength and health before subjecting them to further chemical processing. If possible, go without nail polish for a week or two after acrylic removal.
By being gentle and patient and nourishing your natural nails after acrylic removal, you can avoid damage and have healthy, beautiful nails again. Moisturizing and avoiding harsh chemicals ensure your nails recover fully from acrylics. With some TLC, your natural nails will return to their best condition.
Conclusion
You have several options to remove your acrylic nails without pain. Don’t suffer through the removal process or damage your nails. With some patience and the right techniques, you can give your nails a break and remove the acrylics comfortably from home. Try soaking them in acetone, filing them down gradually, or using an electric nail drill. Give your nails some TLC after the acrylics are off with moisturizing cuticle oil, and avoid any harsh chemicals for a couple of days. Your natural nails will thank you for taking the time to remove the acrylics properly. You’ll keep your nails healthy and strong with regular nail care and occasional breaks from acrylics. Time to start fresh and give your natural nails a chance to shine through again!